Handley Page Type O
Stylizing a WWI airplane in 3D
Intent
Goal
Software
Improve: Stylized design, 3D modelling, hand-painting textures
A 'Chunky', stylized, low-poly WWI 3D airplane model.
Skills improved
- Photoshop
- Hand-Painting textures
- Stylized design
- Non-destructive layer workflow in Photoshop
- 3DS Max
- 3D low-poly modelling
- 3D model unwrap
Stylized Design
The main goal of this small project was to learn stylized design. To do this, I'd be turning a
WWI-era airplane into a 'chunky, low-poly version.
Along with that, I also was to learn to hand-paint textures, using blending, layering,
shading, and other techniques.
To wrap it up, I'd be combining everything and showcase it on Sketchfab, without any
post-processing or AO whilst still having the model look good.
Photobash & sketch
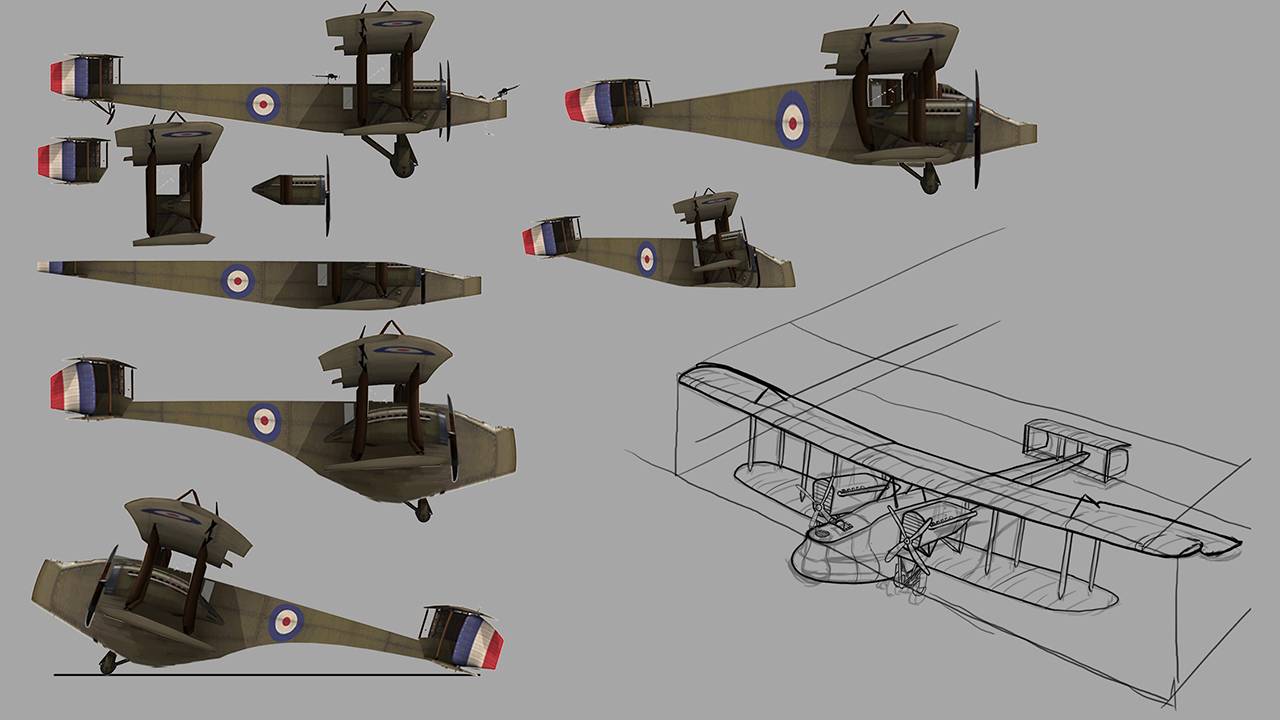
While choosing the plane type and getting reference, I found what I needed on a
site that sold realistic toy model kits. Using one of their model blueprints, I split up the
side view into plane parts and photobashed for ideas.
An idea formed quickly: Having the plane resemble a dragonfly. After some more iterations, I
managed a variant that implemented the idea in a good, 'chunky' way.
Using that variant, I drew up some more sketches on paper and created a digital
3/4 perspective sketch to use as the base idea for the 3D model.

Creating the model
Using low-poly workflow, I created the standard mesh quickly by using the blueprint I had. Then I applied modifiers to change parts of the mesh to have it resemble the photobash/sketch result. To enrich the model and make it look more stylized, I experimented with proportion and shape alterations for various parts.
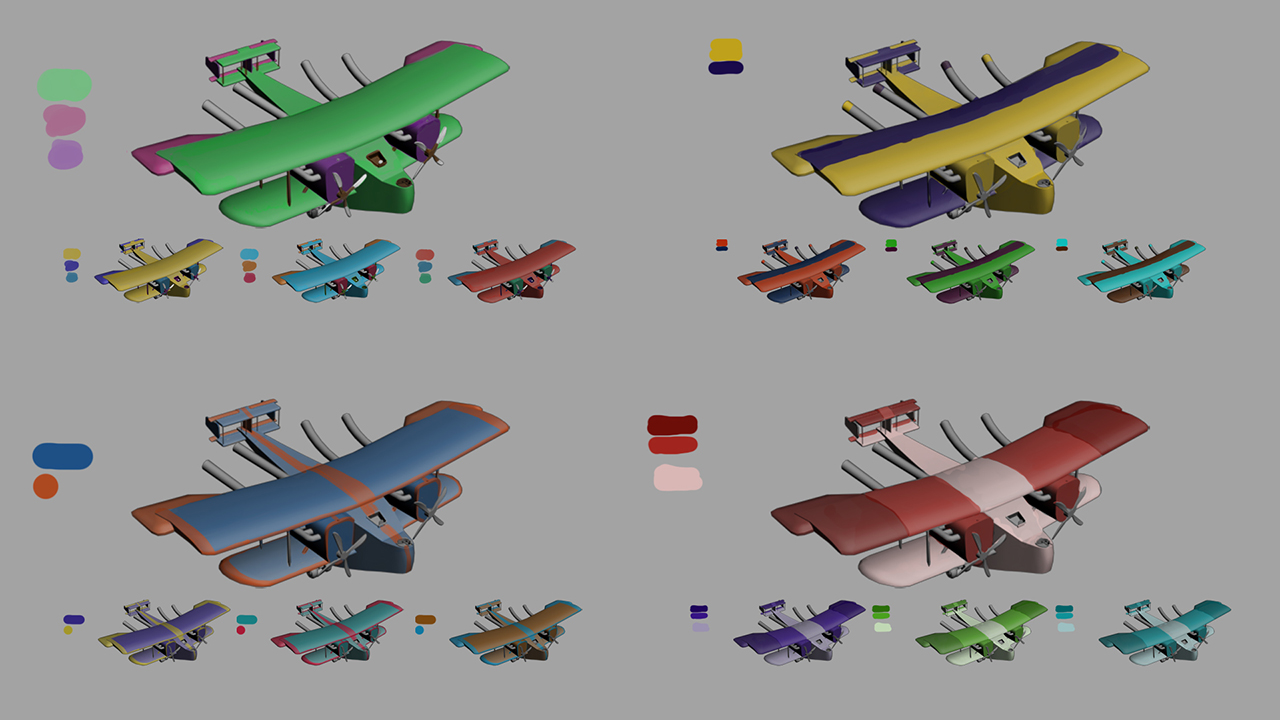
Colours
Colour iterations were done by using the 3D model, and painting mock-up colour schemes on it to find what would work. I went with a simple two-tone green/purple scheme.


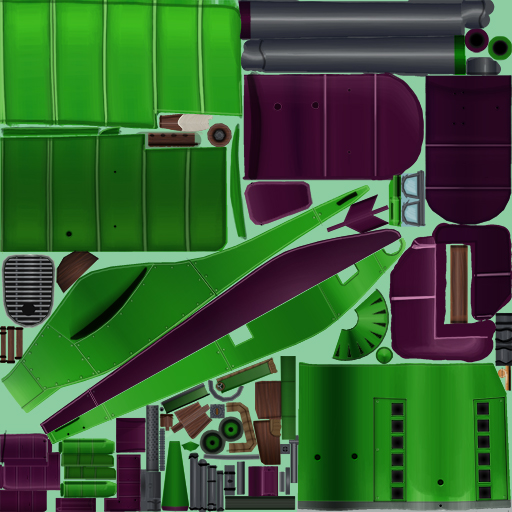
Hand painting the texture
The hardest part for me was the hand painting of the textures. Considering this was my first
time actually painting something, this was pared with a lot of research on "how to".
As I would not have AO or post-processing, creating readability of the model through the diffuse
would be mandatory. This meant I'd have to pay attention where to paint AO shadows, and apply
shading in a light-direction dependant way. To make matters even harder: This was a low-poly
model, meaning I'd also have to create shape in the texture.
The main technique I used was blending my brush strokes, using the brush's opacity setting.
To compliment that, I used layers with only light/shadows and Photoshop's layer blending in
order to create extra shading.
After a lot of manual work, I reviewed the model and was glad that it had a good readability.
Not the best of what's out there, but a good job for my first time hand-painting a model!